How to Use the Windows 11 Virtualization Features
Unlocking Windows 11: Your Guide to Virtualization Mastery
Hey there, tech enthusiasts! Ever felt like your computer is stuck in a one-app-at-a-time rut? Or maybe you’ve heard whispers of running different operating systems on the same machine, but it all sounds like some futuristic sci-fi movie? Well, guess what? The future is now, and it’s called virtualization! Think of it as having multiple computers inside your computer – like those Russian nesting dolls, but instead of dolls, it's entire operating systems. Pretty cool, right?
Now, before you start picturing yourself as a digital wizard conjuring virtual machines (VMs) out of thin air, let’s address the elephant in the room: Windows 11 virtualization. Maybe you've stumbled across terms like Hyper-V or WSL and felt a wave of confusion wash over you. Maybe you tried to enable virtualization in your BIOS settings and felt like you were decoding ancient runes. Trust me, we’ve all been there. It's like trying to assemble IKEA furniture without the instructions – frustrating and often leading to unexpected results (and sometimes extra screws that you swear weren't there before).
The problem is, virtualization in Windows 11 isn’t always straightforward. You might run into compatibility issues, struggle with configuration settings, or simply not know where to start. The official documentation can feel like reading a textbook written in Klingon, and online forums are often filled with conflicting advice and technical jargon that makes your head spin. It's enough to make you want to throw your hands up in the air and go back to playing solitaire (which, let's be honest, is sometimes the more appealing option).
But fear not, my friends! This guide is your friendly neighborhood tech guru, here to demystify the world of Windows 11 virtualization. We’re going to break down the process step-by-step, using plain English and relatable examples, so you can finally harness the power of VMs without needing a Ph D in computer science. We’ll cover everything from enabling virtualization in your BIOS to setting up your first virtual machine and troubleshooting common issues. We’ll even throw in some tips and tricks to make the whole experience smoother and more enjoyable. Consider this your personal virtualization cheat sheet.
Why bother with all this virtualization business anyway? Well, the benefits are huge! Want to test out a new operating system like Linux without messing up your Windows installation? Virtualization allows you to do that. Need to run older software that’s incompatible with Windows 11? No problem, just spin up a VM with an older version of Windows. Want to create a safe environment for testing software or browsing suspicious websites? Virtualization has got your back. It's like having a digital playground where you can experiment without fear of breaking anything. Imagine being able to try out that sketchy software you saw advertised without worrying about unleashing a virus on your precious system! That's the power of virtualization. It is also a great skill to put on your resume and can help you score that dream IT job!
In today's world, where software development, cybersecurity, and cross-platform compatibility are increasingly vital, virtualization is more than just a cool trick – it's a necessity. Whether you're a developer testing applications, a cybersecurity professional analyzing malware, or simply a curious user exploring different operating systems, understanding virtualization is a game-changer. It's the key to unlocking new possibilities and staying ahead of the curve in the ever-evolving world of technology. Even your grandma could benefit from virtualization, separating her email from the rest of her work, creating a safer environment.
So, are you ready to take your Windows 11 skills to the next level? Are you excited to finally conquer the world of virtual machines and unlock the full potential of your computer? Good! Because in the next sections, we're going to dive deep into the world of Windows 11 virtualization and show you exactly how to do it. We’ll unravel the mysteries of Hyper-V, explore the wonders of WSL, and guide you through the entire process with clear, concise instructions and plenty of helpful tips. Prepare to be amazed by the power and versatility of virtualization. But first, let’s make sure your system is ready for the adventure ahead. What hardware and software prerequisites do you need to meet? Let's find out!
How to Use the Windows 11 Virtualization Features
Alright, let's get down to business. We're going to walk through the steps to unlock the virtualization magic within Windows 11. It might seem daunting at first, but trust me, it’s easier than parallel parking a semi-truck. Just follow along, and you'll be virtualizing like a pro in no time!
Checking Hardware and Software Prerequisites
Before diving headfirst into the virtualization pool, let's make sure your computer is actually equipped to handle it. Think of it as checking if you have the right swimsuit before jumping into the deep end. Here's what you need to look for:
• CPU Compatibility: This is the big one. Your CPU needs to support virtualization. Most modern CPUs do, but it's always good to double-check. For Intel processors, look for Intel VT-x technology. For AMD processors, look for AMD-V technology. You can usually find this information on the manufacturer's website (Intel or AMD) by searching for your specific CPU model. This feature allows your processor to efficiently manage multiple virtual machines. If you skip this step, you might find yourself banging your head against the wall later when your virtual machine refuses to start. It's like trying to bake a cake without an oven – it's just not going to work!
• Sufficient RAM: Virtual machines need memory to run, just like real computers. I recommend a minimum of 8GB of RAM, but 16GB or more is ideal, especially if you plan to run multiple VMs simultaneously or resource-intensive applications within your VMs. Think of it this way: each VM is like inviting a guest to your computer party. You need enough space (RAM) for everyone to be comfortable. Trying to cram too many guests into a small room (insufficient RAM) will lead to a laggy, unresponsive experience.
• Sufficient Disk Space: Your virtual machines will need storage space for their operating systems, applications, and data. Make sure you have enough free disk space on your hard drive or SSD. I recommend at least 50GB per VM, but more is always better. An SSD is highly recommended for faster performance. Imagine trying to load a game from a floppy disk – it would take forever! Similarly, running a VM from a slow hard drive will result in sluggish performance. An SSD will significantly improve the speed and responsiveness of your virtual machines.
• 64-bit Version of Windows 11: Virtualization features like Hyper-V require a 64-bit version of Windows 11. If you're running a 32-bit version, you'll need to upgrade before you can proceed. Think of it like trying to fit a square peg into a round hole – it's just not going to work. A 64-bit operating system is required to support the memory and processing power needed for virtualization.
Enabling Virtualization in BIOS/UEFI
Once you've confirmed that your hardware is up to snuff, the next step is to enable virtualization in your computer's BIOS or UEFI settings. This is like flipping the switch that allows your CPU to actually use its virtualization capabilities. Here's how:
• Restart Your Computer: This is the obvious first step, but it's important. You'll need to access the BIOS/UEFI settings during the startup process.
• Enter BIOS/UEFI Setup: While your computer is booting up, press the appropriate key to enter the BIOS/UEFI setup. This key varies depending on your computer manufacturer, but it's usually one of the following: Delete, F2, F12, Esc, or F1. Check your computer's manual or the manufacturer's website if you're unsure. The correct key is often displayed briefly on the screen during the startup process. Pay close attention! It's like trying to catch a glimpse of a shooting star – blink and you'll miss it.
• Locate Virtualization Settings: Once you're in the BIOS/UEFI setup, navigate to the section that contains CPU or processor settings. The exact name and location of these settings will vary depending on your motherboard manufacturer. Look for options like "Virtualization Technology," "Intel VT-x," or "AMD-V." These options might be hidden under advanced settings or CPU configuration. Don't be afraid to explore! It's like going on a treasure hunt – the prize is virtualization!
• Enable Virtualization: If the virtualization option is disabled, enable it. Save your changes and exit the BIOS/UEFI setup. Your computer will restart. Make sure to save your changes! Otherwise, you'll have to go through the whole process again. It's like spending hours building a sandcastle only to have the tide wash it away.
Enabling Hyper-V in Windows 11
Hyper-V is Microsoft's built-in virtualization platform for Windows. It allows you to create and manage virtual machines directly from within Windows. Here's how to enable it:
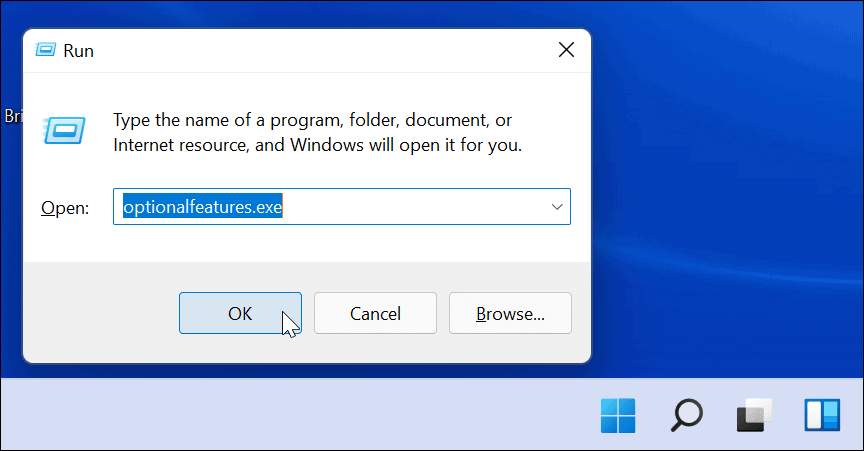
• Open Control Panel: Search for "Control Panel" in the Windows search bar and open it.
• Navigate to Programs: Click on "Programs" or "Programs and Features."
• Turn Windows Features On or Off: Click on "Turn Windows features on or off."
• Locate Hyper-V: In the list of Windows features, find "Hyper-V" and check the box next to it. This will enable the Hyper-V platform and all its components.
• Click OK: Click "OK" to apply the changes. Windows will install the necessary files and may require you to restart your computer. This process can take a few minutes, so be patient. Don't interrupt the installation process! Otherwise, you might end up with a corrupted installation.
• Restart Your Computer: After the installation is complete, restart your computer to fully enable Hyper-V.
Creating Your First Virtual Machine with Hyper-V
Now that Hyper-V is enabled, you can finally create your first virtual machine. This is where the real fun begins! Here's how:
• Open Hyper-V Manager: Search for "Hyper-V Manager" in the Windows search bar and open it.
• Connect to Your Server: In the Hyper-V Manager window, right-click on your computer name in the left pane and select "Connect to Server."
• Create a New Virtual Machine: In the Hyper-V Manager window, right-click on your computer name in the left pane and select "New" > "Virtual Machine." This will launch the New Virtual Machine Wizard.
• Follow the Wizard: The New Virtual Machine Wizard will guide you through the process of creating a new VM. You'll need to specify a name for your VM, choose a generation (Generation 1 for older operating systems, Generation 2 for newer operating systems), allocate memory, configure networking, and create a virtual hard disk. The wizard is pretty straightforward, so just follow the instructions and make sure to choose appropriate settings for your needs. It's like following a recipe – just follow the steps and you'll end up with a delicious virtual machine!
• Install an Operating System: Once the VM is created, you'll need to install an operating system on it. You can do this by booting the VM from an ISO image (a virtual copy of an installation disc) or a physical installation disc. In the Hyper-V Manager window, right-click on your VM and select Connect.This will open a virtual console window. Then, go to "Action" > "Insert Disk" and choose your ISO image or physical disc. Finally, start the VM and follow the on-screen instructions to install the operating system. This is like building a house – you need to lay the foundation (install the operating system) before you can start furnishing it (installing applications).
Exploring Windows Subsystem for Linux (WSL)
While Hyper-V is great for running full-fledged virtual machines, WSL offers a lightweight alternative for running Linux distributions directly within Windows. It's perfect for developers who need to use Linux tools and utilities without the overhead of a full VM. WSL is a way to run Linux on your computer, but in a lightweight environment. You can use Linux commands and utilities without needing a full virtual machine. This can be a more efficient and faster way to work with Linux tools.
• Enable WSL: Open Power Shell as administrator and run the command `Enable-Windows Optional Feature -Online -Feature Name Microsoft-Windows-Subsystem-Linux`. You may need to restart your computer.
• Install a Linux Distribution: Open the Microsoft Store and search for your favorite Linux distribution, such as Ubuntu, Debian, or Kali Linux. Install the distribution of your choice.
• Launch Your Linux Distribution: Once the installation is complete, launch your Linux distribution from the Start menu. This will open a terminal window where you can run Linux commands.
• Start Using Linux: You can now use your Linux distribution as if it were running on a separate computer. You can install software, run commands, and access files.
Troubleshooting Common Virtualization Issues
Even with the best instructions, you might run into some snags along the way. Here are some common virtualization issues and how to fix them:
• Virtualization Not Enabled in BIOS/UEFI: This is the most common issue. Double-check your BIOS/UEFI settings to make sure virtualization is enabled.
• Hyper-V Not Installing: Make sure you're running a 64-bit version of Windows 11 and that you have the necessary updates installed. Also, check for any conflicts with other virtualization software.
• Virtual Machine Not Starting: Check the VM's settings to make sure it has enough memory and disk space allocated. Also, make sure the virtual hard disk is not corrupted.
• Network Connectivity Issues: Make sure the VM is configured to use a virtual network adapter and that the network adapter is properly configured in Windows.
• Performance Issues: Virtualization can be resource-intensive. Close any unnecessary applications and processes to free up system resources. Also, consider upgrading your RAM or using an SSD for better performance.
If you encounter any other issues, don't hesitate to consult online forums or the Microsoft documentation for help. There's a wealth of information available online, and chances are someone else has already encountered the same problem and found a solution.
Real-World Examples and Use Cases
Now that you know how to use Windows 11 virtualization features, let's explore some real-world examples and use cases to get your creative juices flowing. Virtualization is a versatile tool that can be used in a variety of scenarios. Here are just a few ideas:
• Software Development and Testing: Developers can use virtualization to create isolated environments for testing software on different operating systems and configurations. This allows them to identify and fix bugs before releasing the software to the public. It's like having a digital sandbox where you can play around with code without fear of breaking anything.
• Cybersecurity and Malware Analysis: Cybersecurity professionals can use virtualization to create safe environments for analyzing malware and other security threats. This allows them to study the behavior of malware without risking infection of their own systems. It's like having a digital laboratory where you can dissect viruses and other malicious code without getting your hands dirty.
• Running Legacy Applications: Many older applications are not compatible with modern operating systems. Virtualization allows you to run these applications in a virtual machine with an older version of Windows. It's like having a time machine that allows you to travel back in time and run software from the past.
• Trying Out New Operating Systems: If you're curious about Linux or other operating systems, virtualization allows you to try them out without installing them on your main computer. It's like test-driving a new car before you buy it.
• Creating a Secure Browsing Environment: You can create a virtual machine specifically for browsing the internet. This will protect your main computer from malware and other online threats. It's like wearing a digital hazmat suit when you're exploring the dangerous corners of the internet.
• Homelab Setup: Advanced users can set up multiple virtual machines to simulate a network environment for testing and learning purposes. This can be useful for learning about networking, server administration, and other IT skills. It's like having your own personal data center in your basement.
These are just a few examples of the many ways you can use Windows 11 virtualization features. The possibilities are endless, so get creative and experiment!
Frequently Asked Questions
Okay, let's tackle some frequently asked questions about Windows 11 virtualization. I've heard these questions a lot from friends and family and from people I've encountered at work.
• Q: Does enabling virtualization slow down my computer?
• A: Enabling virtualization itself doesn't necessarily slow down your computer. However, running virtual machines can consume significant system resources (CPU, RAM, disk space), which can impact performance if your computer is not powerful enough. The impact on performance depends on how many virtual machines you are running and what they are doing. If you're only running one or two lightweight VMs, you might not notice any significant slowdown. However, if you're running multiple resource-intensive VMs, you might experience performance issues.
• Q: Can I run a virtual machine and use my computer normally at the same time?
• A: Yes, you can run a virtual machine and use your computer normally at the same time. However, keep in mind that the virtual machine will be using system resources, which can impact the performance of your other applications. The extent of the impact depends on the resources allocated to the VM and the tasks you're performing on both the VM and your host machine. For example, if you're running a game on your host machine while also running a VM that's compiling code, you might experience some slowdown.
• Q: Is Hyper-V the only virtualization option in Windows 11?
• A: No, Hyper-V is not the only virtualization option in Windows 11. You can also use Windows Subsystem for Linux (WSL) to run Linux distributions directly within Windows, or you can install third-party virtualization software like VMware Workstation or Virtual Box. Each option has its own advantages and disadvantages, so choose the one that best meets your needs.
• Q: Is it safe to run virtual machines?
• A: Running virtual machines is generally safe, but it's important to take precautions to protect your system from malware and other security threats. Avoid downloading files from untrusted sources and keep your virtual machines and host operating system up to date with the latest security patches. Also, consider using a virtual network adapter to isolate your virtual machines from your main network.
Remember that if you have questions that I did not answer, don't hesitate to consult online forums or the Microsoft documentation for help. There's a wealth of information available online, and chances are someone else has already encountered the same problem and found a solution.
Congratulations, friends! You've reached the end of this comprehensive guide to using Windows 11 virtualization features. We've covered everything from checking hardware prerequisites to creating your first virtual machine and troubleshooting common issues. You've armed yourself with the knowledge and skills to unlock the power of virtualization and take your Windows 11 experience to the next level. Pat yourself on the back – you deserve it!
Let's quickly recap what we've learned. We started by understanding the importance of virtualization and its various use cases. We then walked through the steps of enabling virtualization in your BIOS/UEFI settings, enabling Hyper-V in Windows 11, and creating your first virtual machine. We also explored the wonders of Windows Subsystem for Linux (WSL) and discussed how to troubleshoot common virtualization issues. Finally, we looked at real-world examples and use cases to inspire you to explore the possibilities of virtualization. This knowledge will benefit your work life, if you are in the IT sector, and can also greatly improve your personal life.
Now that you're equipped with all this knowledge, it's time to put it into practice! Don't just sit there and let this newfound knowledge gather dust. Go out there and create your own virtual machines. Experiment with different operating systems. Test out new software. Explore the possibilities of virtualization. The more you practice, the more comfortable and confident you'll become. Think of it like learning a new language – the more you speak it, the more fluent you'll become.
Here's my call to action: I challenge you to create your first virtual machine within the next 24 hours. Choose an operating system that you're curious about, whether it's Linux, an older version of Windows, or something else entirely. Follow the steps outlined in this guide and create your own virtual playground. Don't be afraid to experiment and make mistakes. That's how we learn and grow. And if you run into any issues, remember that there's a wealth of information available online, and I'm always here to help. I believe in you, and I know you can do it!
Remember, virtualization is more than just a technical skill – it's a mindset. It's about being curious, experimental, and willing to push the boundaries of what's possible. It's about embracing new technologies and finding creative solutions to problems. It's about empowering yourself to do more with your computer and your data. The world of technology is constantly evolving, and virtualization is a key skill for staying ahead of the curve.
So, go forth and virtualize! Unleash your inner tech guru and unlock the full potential of your Windows 11 system. Embrace the power of virtualization and create a world of possibilities right at your fingertips. Are you ready to take on the challenge and become a virtualization master?
Post a Comment for "How to Use the Windows 11 Virtualization Features"
Post a Comment