How to Troubleshoot High Memory Usage in Windows 11
Is Your PC Gaslighting You About Its Memory? Here's How to Prove It Wrong
Hey there, fellow Windows 11 adventurers! Ever feel like your trusty PC is moving slower than a snail in molasses? Like it's got all the processing power of a potato clock? Chances are, high memory usage might be the culprit. We've all been there, staring blankly at Task Manager, wondering why our system is hogging all the RAM like it's the last slice of pizza at a tech conference. You might be browsing a single webpage, and BAM, 90% memory usage. It’s infuriating, right? It’s like your computer is staging a silent protest against your very existence.
Now, before you chuck your beloved machine out the window (tempting, I know), let's dive into the nitty-gritty of troubleshooting this RAM-guzzling beast. High memory usage doesn't always mean there's a sinister virus lurking in the shadows or that your hardware is on its last legs. Sometimes, it's just a matter of understanding what's going on under the hood and making a few tweaks. Think of it as giving your PC a much-needed spa day – a little decluttering, a bit of optimization, and maybe a digital face mask (metaphorically speaking, of course).
We're talking about those pesky background processes that quietly nibble away at your memory, the bloatware that came pre-installed and is now about as useful as a chocolate teapot, and even some unexpected software conflicts. And let's not forget about the good old memory leaks, where programs essentially forget to release the RAM they've borrowed, leaving your system gasping for air. Windows 11, despite its sleek design and fancy features, isn’t immune to these issues.
This isn't just about making your computer run faster (although, who doesn't want that?). It's about understanding your system, taking control, and preventing future headaches. It’s about empowering you to be your own tech support hero, saving you from the dreaded call to customer service where you're inevitably put on hold while listening to elevator music that sounds suspiciously like dial-up modem noises.
So, are you ready to reclaim your RAM, unleash the true potential of your Windows 11 machine, and finally understand what all those numbers in Task Manager actually mean? Let's get started! By the end of this article, you’ll be equipped with the knowledge and tools to diagnose and fix high memory usage, making your PC run smoother, faster, and more efficiently. Trust me, your computer will thank you for it (probably not verbally, but you'll feel the difference). What's lurking in the depths of your Task Manager, and how can you banish it? Let’s find out!
Decoding the Memory Mystery: Troubleshooting High RAM Usage in Windows 11
Alright, friends, let’s roll up our sleeves and get into the real meat of this memory madness. We're going to break down the troubleshooting process into manageable chunks, so even if you're not a tech whiz, you can follow along and reclaim your precious RAM.
• Checking Task Manager: Your First Line of Defense
Task Manager is your trusty sidekick in this battle. Think of it as the PC equivalent of a doctor’s stethoscope. It gives you a real-time snapshot of what’s happening inside your system. To access it, simply right-click on the Windows taskbar and select "Task Manager," or press Ctrl+Shift+Esc. Once open, click on the "Processes" tab. Here, you'll see a list of all running applications and background processes, along with their CPU, memory, and disk usage. Click the "Memory" column to sort processes by memory consumption. This will quickly reveal the RAM hogs that are slowing you down.
Look for processes that are consistently using a large chunk of memory, even when you're not actively using them. Sometimes, the culprit is obvious – a memory-leaking application that's slowly eating up more and more RAM over time. Other times, it might be a background service you didn't even know was running. Once you identify the offenders, you can decide whether to close them, uninstall them, or investigate further.
Real-world example: Imagine you're just browsing the web, but you notice that your antivirus software is using a significant amount of memory even when you're not running a scan. This could indicate a configuration issue or a problem with the software itself. Similarly, a game you haven't played in weeks might still be running in the background, consuming valuable resources. Closing or uninstalling these unnecessary processes can make a huge difference.
• Identifying and Eliminating Startup Programs
Startup programs are those applications that automatically launch when you boot up your computer. While some are essential (like your antivirus software), many are just unnecessary bloatware that slows down your system and consumes memory from the get-go. Think of them as uninvited guests crashing your PC's party.
To manage startup programs, open Task Manager (Ctrl+Shift+Esc) and click on the "Startup apps" tab. Here, you'll see a list of all applications that are configured to launch at startup, along with their "Startup impact" rating (High, Medium, Low). Disable any programs that you don't need running automatically. Simply select the program and click the "Disable" button in the bottom right corner.
Remember, disabling a startup program doesn't uninstall it; it just prevents it from launching automatically. You can still run the program manually whenever you need it. Be cautious when disabling programs, especially if you're unsure what they do. A quick Google search can usually provide more information about a program's purpose and whether it's safe to disable.
Pro Tip: Many applications add themselves to the startup list without your explicit consent. Regularly reviewing your startup programs and disabling unnecessary ones can significantly improve your system's performance and reduce memory usage.
• Investigating Background Processes and Services
Background processes and services are the unsung heroes (or villains) of your operating system. They perform essential tasks behind the scenes, such as managing network connections, updating software, and providing system-level functionality. However, some background processes can be resource-intensive and contribute to high memory usage. This is where we delve into more detail than just the Task Manager.
Services can be managed through the Services app (search for "Services" in the Windows search bar). Here, you'll see a list of all services running on your system, along with their status (Running or Stopped) and startup type (Automatic, Manual, Disabled). Be extremely cautious when disabling or modifying services, as some are essential for the proper functioning of your operating system.
A good starting point is to identify services that are set to "Automatic" startup and are consistently consuming a large amount of memory. If you don't need a particular service running all the time, you can change its startup type to Manual.This will prevent it from launching automatically at startup, but you can still start it manually when needed. You can also disable them completely, but be cautious to read about the service before doing so.
Example: The "Windows Search" service indexes your files for faster searching. While useful, it can consume a significant amount of memory and CPU resources, especially during the indexing process. If you don't use the Windows search feature frequently, you can set this service to "Manual" startup to reduce memory usage.
• Dealing with Memory Leaks
Memory leaks are a common cause of high memory usage in Windows 11. A memory leak occurs when an application allocates memory but fails to release it properly, leading to a gradual increase in memory consumption over time. Think of it as a leaky faucet – a small drip might not seem like much, but over time, it can fill up a whole bucket.
Identifying memory leaks can be tricky, as they often manifest as a gradual increase in memory usage over time rather than a sudden spike. Task Manager can help you spot potential memory leaks by monitoring the memory usage of individual processes over an extended period. If you notice that a particular application's memory usage is steadily increasing, even when you're not actively using it, it could be a sign of a memory leak.
Unfortunately, there's no single "magic bullet" for fixing memory leaks. The solution often depends on the specific application or driver causing the problem. Here are some general troubleshooting steps:
• Restart the application: This is the simplest and often most effective solution. Restarting the application will release any leaked memory and start it with a clean slate.
• Update the application: Software developers often release updates to fix bugs and memory leaks. Make sure you're running the latest version of the application.
• Reinstall the application: If updating doesn't fix the problem, try reinstalling the application. This will ensure that you have a clean and complete installation.
• Update your drivers: Outdated or corrupted drivers can sometimes cause memory leaks. Make sure you have the latest drivers for your graphics card, network adapter, and other hardware components.
• Scan for malware: Malware infections can sometimes cause memory leaks. Run a full system scan with your antivirus software.
• Consider alternative software: If the memory leak is persistent and cannot be resolved, consider switching to a different application that performs the same function.
• Optimizing Virtual Memory (Page File)
Virtual memory, also known as the page file, is a feature of Windows that allows your system to use hard disk space as an extension of RAM. When your physical RAM is full, Windows moves less frequently used data from RAM to the page file, freeing up RAM for active applications. While virtual memory can help prevent your system from crashing when it runs out of RAM, it's significantly slower than physical RAM.
By default, Windows automatically manages the size of the page file. However, in some cases, you may need to adjust the page file settings manually to optimize performance and reduce memory usage. This involves setting a fixed size for the page file. While it might sound intimidating, it's straightforward.
To adjust the page file settings, search for "performance" in the Windows search bar and select "Adjust the appearance and performance of Windows." In the Performance Options window, click on the "Advanced" tab and then click on the "Change" button under the "Virtual memory" section. Uncheck the "Automatically manage paging file size for all drives" box. Select the drive where Windows is installed (usually C:) and choose the "Custom size" option. Enter an initial size and maximum size for the page file. A good starting point is to set both values to 1.5 times the amount of your physical RAM. Click "Set" and then "OK" to save your changes. You will likely need to restart your computer for the changes to take effect.
Important Considerations:
• Don't disable the page file completely, unless you have a very specific reason to do so. Disabling the page file can cause system instability and crashes.
• If you have a solid-state drive (SSD), it's generally recommended to keep the page file enabled, as it can still improve performance in certain situations.
• Experiment with different page file sizes to find the optimal settings for your system.
• Consider the memory-compression feature added to Windows. It compresses older pages in memory, meaning Windows can store more data in physical memory, reducing the need to read or write to disk.
• Check for Malware Infections
Malware infections can be a significant cause of high memory usage. Viruses, spyware, and other malicious software can consume system resources and interfere with normal operations, leading to performance issues and memory leaks. It's like having unwelcome guests who not only overstay their welcome but also ransack your fridge and steal your belongings.
If you suspect that your system is infected with malware, run a full system scan with your antivirus software. Make sure your antivirus software is up to date and that you're using a reputable program from a trusted vendor. In addition to your primary antivirus software, consider running a scan with a dedicated anti-malware tool, such as Malwarebytes. These tools can often detect and remove malware that your antivirus software might miss.
Safe Mode Scan: For a deeper clean, boot your computer into Safe Mode and run a scan from there. Safe Mode loads Windows with only essential drivers and services, which can help prevent malware from interfering with the scan.
Regular Scans: Schedule regular scans with your antivirus software to keep your system protected from malware infections. Prevention is always better than cure!
• Update Your Drivers
Outdated or corrupted drivers can cause a variety of problems, including high memory usage. Drivers are the software that allows your operating system to communicate with your hardware components, such as your graphics card, network adapter, and printer. When drivers are outdated or corrupted, they can cause conflicts, memory leaks, and other performance issues.
To update your drivers, you can use the Device Manager. Right-click on the Start button and select "Device Manager." Here, you'll see a list of all hardware devices installed on your system. Look for devices with a yellow exclamation mark, which indicates a problem with the driver.
To update a driver, right-click on the device and select "Update driver." You can choose to search automatically for updated drivers or browse your computer for driver software. If you choose to search automatically, Windows will attempt to find the latest driver for your device from the internet. If you choose to browse your computer, you'll need to have the driver software downloaded and saved on your hard drive.
Manufacturer's Website: The most reliable way to get the latest drivers is to download them from the manufacturer's website. For example, if you have an NVIDIA graphics card, you can download the latest drivers from the NVIDIA website. Similarly, if you have an Intel network adapter, you can download the latest drivers from the Intel website.
Windows Update: Windows Update can also provide driver updates. Make sure you have the latest updates installed for your operating system.
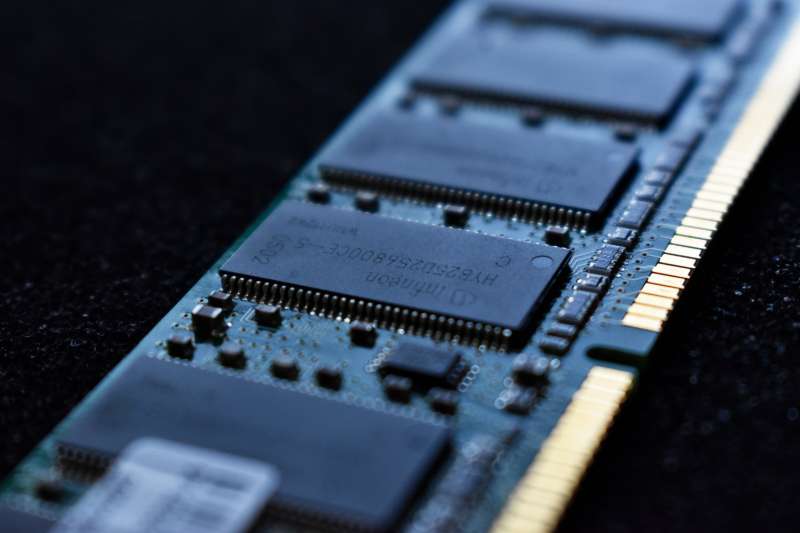
• Hardware Considerations and Upgrades
Sometimes, high memory usage is simply a result of having insufficient RAM for your workload. If you're running demanding applications, such as video editing software, games, or virtual machines, you may need to upgrade your RAM to improve performance and reduce memory usage. This is especially true if you're consistently using 80% or more of your RAM.
Before upgrading your RAM, check your motherboard's specifications to determine the maximum amount of RAM it can support and the type of RAM it requires (e.g., DDR4, DDR5). You can usually find this information on the manufacturer's website or in the motherboard's manual. Also, consider that 32-bit versions of Windows have memory limitations.
Matching RAM: When upgrading your RAM, it's important to use compatible modules from a reputable manufacturer. Ideally, you should use RAM modules that are identical in terms of capacity, speed, and timings. Using mismatched RAM modules can sometimes cause compatibility issues and performance problems.
Easy Installation: Installing RAM is a relatively straightforward process, but it's important to follow the manufacturer's instructions carefully. Before installing RAM, make sure your computer is turned off and unplugged from the power outlet. Also, ground yourself to prevent static electricity from damaging the RAM modules.
• Resetting Windows 11
As a last resort, if you've tried all other troubleshooting steps and are still experiencing high memory usage, you may need to reset Windows 11 to its factory default settings. This will erase all your data and installed applications, so be sure to back up your important files before proceeding. Think of it as a digital cleanse, wiping away all the accumulated gunk and grime that's been slowing down your system.
To reset Windows 11, search for "reset this PC" in the Windows search bar and select "Reset this PC." You'll be presented with two options: "Keep my files" and "Remove everything." If you choose "Keep my files," Windows will reinstall itself while preserving your personal files. However, it will still remove all installed applications and settings. If you choose "Remove everything," Windows will erase all data on your hard drive and reinstall itself from scratch. This is the most thorough option, but it will also take the longest.
Clean Install: For the best results, consider performing a clean install of Windows 11 using a USB drive or DVD. This will ensure that you have a fresh and uncorrupted installation of the operating system. You can download the Windows 11 installation media from the Microsoft website.
Fresh Start: After resetting or reinstalling Windows 11, be careful about which applications you install. Avoid installing unnecessary bloatware and be mindful of the resources consumed by each application. A clean system with only essential applications will perform much better than a system cluttered with unnecessary software.
Frequently Asked Questions
• Question: My Task Manager shows high memory usage, but I can't identify any specific process that's using a lot of RAM. What could be the problem?
• Answer: This could indicate a driver issue, malware infection, or a memory leak that's not easily attributable to a single process. Try updating your drivers, running a malware scan, and monitoring your system for memory leaks over an extended period.
• Question: Is it safe to disable all startup programs?
• Answer: No, it's not safe to disable all startup programs. Some startup programs are essential for the proper functioning of your operating system and hardware components. Before disabling a startup program, research its purpose and make sure it's not critical for your system's stability.
• Question: How much RAM do I need for Windows 11?
• Answer: The minimum recommended RAM for Windows 11 is 4 GB, but 8 GB or more is recommended for optimal performance, especially if you're running demanding applications or multitasking frequently. For gaming or professional workloads, 16 GB or 32 GB of RAM may be necessary.
• Question: Will upgrading to an SSD improve my memory usage?
• Answer: While upgrading to an SSD won't directly reduce your memory usage, it can significantly improve your system's overall performance, especially when virtual memory is being used. An SSD will allow Windows to access the page file much faster than a traditional hard drive, which can help reduce the performance impact of high memory usage.
We've reached the finish line, friends! By now, you should have a solid understanding of how to troubleshoot high memory usage in Windows 11 and be well-equipped to tackle those pesky RAM-hogging processes. We’ve explored everything from using Task Manager to identify the culprits, disabling unnecessary startup programs, and investigating background processes, to dealing with memory leaks, optimizing virtual memory, checking for malware, updating drivers, and even considering hardware upgrades.
Remember, the key to a smooth-running system is vigilance and a proactive approach. Regularly monitor your memory usage, keep your drivers and software up to date, and be mindful of the applications you install. A little bit of maintenance can go a long way in preventing performance issues and ensuring a frustration-free computing experience.
So, what's the next step? It’s time to put your newfound knowledge into practice! Open up that Task Manager, take a good hard look at those processes, and start reclaiming your RAM. Your PC will thank you for it, and you'll finally be able to enjoy that smooth, responsive performance you deserve. We encourage you to make one small change, like disabling a startup program you don't need. Do it now! You'll be one step closer to a leaner, meaner, more efficient machine.
Now go forth and conquer those memory woes! Remember, a happy computer makes for a happy you. And who knows, maybe you'll even discover a hidden talent for PC optimization along the way. Are there any other tech mysteries you'd like to see unraveled?
Post a Comment for "How to Troubleshoot High Memory Usage in Windows 11"
Post a Comment