How to Use the Windows 11 Eye Control Features
Unlock Your Computer with Just Your Eyes: A Guide to Windows 11 Eye Control
Hey there, tech enthusiasts! Ever felt like you're living in the future? Well, Windows 11 is here to nudge us even further. We’re talking about something straight out of a sci-fi movie: controlling your computer with your eyes. Yeah, you heard that right! No more frantically searching for the mouse or struggling with a trackpad that seems to have a personal vendetta against you. Imagine the possibilities: hands-free browsing, effortless multitasking, and impressing your friends with your futuristic setup. Think about it – you could be scrolling through cat videos on You Tube, composing emails, or even playing simple games, all with just the power of your gaze. No more keyboard and mouse – just you and your peepers, working in perfect harmony.
Sounds like a dream, doesn't it? But like all dreams, there's usually a catch. In this case, it’s the initial setup and the learning curve. Trust me, I’ve been there. I remember when I first tried to use voice control on my computer – I spent half an hour yelling at it to open a Word document, only to have it repeatedly launch my music player. Good times. Eye control can be a bit like that at first. You might find yourself accidentally clicking on things you didn’t mean to, or struggling to get the cursor to go where you want it. But don't worry, we’re going to walk through it together.
Now, before you get too excited and start throwing away your mouse, let's be real: eye control isn't perfect. It's not going to replace your traditional input methods entirely, at least not yet. But it's an incredible accessibility feature that can be a game-changer for people with disabilities, and it's also a fun and fascinating way to interact with your computer. Plus, it's constantly improving, so who knows what the future holds? Maybe one day we'll all be controlling our computers with our minds – but for now, eye control is a pretty awesome step in that direction.
So, are you ready to dive into the world of Windows 11 Eye Control? Great! Because in this comprehensive guide, we're going to explore everything you need to know to get started, from setting up your eye tracker to mastering the basics of eye-controlled navigation. We’ll cover the hardware you’ll need, the software configuration, and even some troubleshooting tips to help you overcome any challenges you might encounter along the way. And who knows, maybe you'll even discover some hidden features and advanced techniques that will make you an eye control pro. Buckle up, because we're about to embark on a journey that will change the way you interact with your computer forever. Intrigued? Keep reading to find out how to unlock the power of Windows 11 Eye Control!
Getting Started with Windows 11 Eye Control
Alright, friends, let's dive into the nitty-gritty of setting up and using Windows 11 Eye Control. It might sound intimidating at first, but trust me, it's much easier than trying to assemble IKEA furniture. We'll break it down into manageable steps, so you can go from zero to eye-control hero in no time. Remember, the goal here is to make your computing experience more accessible and fun, so let's get started!
Hardware Requirements: Choosing the Right Eye Tracker
First things first, you'll need an eye tracker. Think of it as the eyes and ears of your Windows 11 Eye Control system. It's a device that uses infrared light and cameras to track your eye movements and translate them into actions on your screen. There are several eye trackers on the market, and choosing the right one can make all the difference.
- Tobii Eye Tracker 5: This is probably the most popular and widely supported eye tracker for Windows 11. It's known for its accuracy, reliability, and ease of use. Plus, it's compatible with a wide range of games and applications, so you can use it for more than just accessibility purposes. Think of it as the Swiss Army knife of eye trackers.
- Eye Tech Digital Systems: Eye Tech offers a range of eye trackers designed for accessibility and communication. Their devices are known for their robustness and accuracy, making them a good choice for users with more complex needs. They can be a bit pricier, but the investment can be worth it if you need a high-performance eye tracker.
- Integrated Eye Trackers: Some laptops and monitors come with built-in eye trackers. While these might not be as accurate as dedicated devices, they can be a convenient option if you don't want to clutter your desk with extra hardware. Just make sure to check the specifications to ensure it's compatible with Windows 11 Eye Control.
When choosing an eye tracker, consider factors like accuracy, tracking range, and compatibility with Windows 11. Read reviews, compare prices, and don't be afraid to ask for recommendations from other users or accessibility experts. Remember, the best eye tracker is the one that works best for you and your specific needs.
Setting Up Your Eye Tracker: A Step-by-Step Guide
Once you've got your eye tracker, it's time to set it up. Don't worry, it's not rocket science. Just follow these simple steps:
- Install the Software: Most eye trackers come with their own software that you'll need to install. This software is responsible for calibrating the device and communicating with Windows 11. Follow the instructions that came with your eye tracker to install the software properly. Usually, it involves inserting a USB or downloading the software from a provided link, so make sure you have a stable internet connection to avoid any issues.
- Connect the Eye Tracker: Connect the eye tracker to your computer using a USB cable. Make sure the cable is securely plugged in to both the eye tracker and your computer. Sometimes a loose connection can cause unexpected issues.
- Calibrate the Eye Tracker: Calibration is the process of teaching the eye tracker to recognize your eye movements. This is a crucial step, as it determines the accuracy of the eye control system. The software will usually guide you through the calibration process, which involves following a dot or pattern on the screen with your eyes. Be patient and try to keep your head still during calibration for the best results.
Enabling Eye Control in Windows 11
Now that your eye tracker is set up, it's time to enable Eye Control in Windows 11. Here's how:
- Open Settings: Press the Windows key + I to open the Settings app. You can also find it in the Start menu.
- Navigate to Accessibility: In the Settings app, click on Accessibility.This is where you'll find all the settings related to making Windows 11 more accessible.
- Find Eye Control: Scroll down the Accessibility menu until you find "Eye control." Click on it to open the Eye Control settings.
- Toggle Eye Control On: Turn the Eye Control toggle switch to the "On" position. This will enable Eye Control and display the launchpad on your screen.
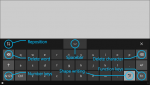
Understanding the Eye Control Launchpad
The Eye Control launchpad is your gateway to controlling Windows 11 with your eyes. It's a small toolbar that appears at the top of the screen and provides access to a range of essential functions. Let's take a closer look at what each button does:
- Mouse: This button activates the mouse control mode. In this mode, you can move the cursor around the screen by looking at different areas, and click by dwelling (i.e., looking at a spot for a short period of time).
- Keyboard: This button opens the on-screen keyboard, which you can use to type by looking at the letters you want to type. It might take some practice, but you'll get the hang of it.
- Text-to-Speech: This button allows you to convert text into speech. You can select text on the screen and have it read aloud, which can be helpful for people with visual impairments or learning disabilities.
- Scroll: This button activates the scroll mode, which allows you to scroll up and down web pages and documents by looking at the top or bottom of the screen.
- Task Switcher: This button opens the task switcher, which allows you to switch between open applications by looking at the app you want to switch to.
- Settings: This button opens the Eye Control settings, where you can adjust various parameters such as dwell time, tracking speed, and button size.
- Pause: This button pauses Eye Control, which can be useful if you want to take a break or use your computer with a traditional mouse and keyboard.
Mastering the Basics of Eye-Controlled Navigation
Now that you know what the Eye Control launchpad does, it's time to learn how to use it. Here are some tips and tricks to help you master the basics of eye-controlled navigation:
- Practice Makes Perfect: Like any new skill, eye control takes practice. Don't get discouraged if you don't get it right away. Start with simple tasks like opening and closing apps, and gradually work your way up to more complex tasks.
- Adjust Dwell Time: Dwell time is the amount of time you need to look at a spot on the screen for it to register as a click. If you're finding that you're accidentally clicking on things you don't mean to, try increasing the dwell time. If you're finding that you have to look at things for too long, try decreasing the dwell time.
- Experiment with Tracking Speed: Tracking speed determines how quickly the cursor moves when you look at different areas of the screen. If you're finding that the cursor is moving too fast, try slowing down the tracking speed. If you're finding that the cursor is moving too slowly, try speeding up the tracking speed.
- Take Breaks: Eye control can be tiring, especially when you're first starting out. Take frequent breaks to rest your eyes and avoid eye strain.
Troubleshooting Common Issues
Even with the best setup and the most practice, you might still encounter some issues with Windows 11 Eye Control. Here are some common problems and how to fix them:
- Eye Tracker Not Detected: If Windows 11 doesn't detect your eye tracker, make sure it's properly connected and that the software is installed correctly. Try restarting your computer or reinstalling the software.
- Poor Tracking Accuracy: If the tracking accuracy is poor, try recalibrating the eye tracker. Make sure your face is well-lit and that there are no bright lights or reflections in your eyes. Also, make sure your glasses (if you wear them) are clean.
- Cursor Moving Erratically: If the cursor is moving erratically, try adjusting the tracking speed and dwell time. Also, make sure there are no obstructions in front of the eye tracker.
Real-World Applications and Benefits
Beyond the cool factor, Windows 11 Eye Control offers a range of real-world applications and benefits, especially for individuals with disabilities.
- Enhanced Accessibility: For people with limited mobility or paralysis, Eye Control can provide a way to interact with their computers and stay connected with the world. It can enable them to communicate, browse the internet, write emails, and even control smart home devices.
- Improved Communication: Eye Control can be used with text-to-speech software to allow individuals with speech impairments to communicate more easily. They can type messages on the on-screen keyboard and have them read aloud, enabling them to participate in conversations and express their thoughts and feelings.
- Increased Independence: By providing a hands-free way to interact with their computers, Eye Control can help people with disabilities to live more independently. They can perform tasks that would otherwise be impossible, such as managing their finances, shopping online, and accessing educational resources.
The Future of Eye Control
The future of eye control is bright. As technology continues to advance, we can expect to see even more accurate, reliable, and affordable eye trackers. We can also expect to see more applications and software that are specifically designed to take advantage of eye control technology.
- Improved Accuracy: Future eye trackers will likely be even more accurate and able to track eye movements more precisely. This will enable users to perform more complex tasks with greater ease and efficiency.
- Wider Adoption: As eye control technology becomes more affordable and accessible, we can expect to see it adopted by a wider range of users. This will drive innovation and lead to the development of new applications and use cases.
- Integration with Other Technologies: Eye control is likely to be integrated with other technologies, such as virtual reality (VR) and augmented reality (AR), to create immersive and interactive experiences. Imagine being able to control a virtual world with just your eyes!
Frequently Asked Questions
- Q: What if I wear glasses? Will Eye Control still work?
A: Generally, yes! Most modern eye trackers are designed to work with glasses. However, very thick or heavily tinted lenses might cause some issues. It's always best to check the specific recommendations of the eye tracker manufacturer. You might need to adjust the positioning of the tracker or the calibration settings.
- Q: Is Eye Control only for people with disabilities?
A: Not at all! While it's an amazing accessibility tool, anyone can use Eye Control. Gamers might find it useful for certain games, and it can also be a fun and novel way to interact with your computer. Think hands-free cooking while following a recipe on your screen!
- Q: How much do eye trackers cost?
A: The price can vary quite a bit. Entry-level eye trackers can start around a few hundred dollars, while more advanced models can cost upwards of a thousand. The Tobii Eye Tracker 5 is a popular mid-range option that offers a good balance of features and price.
- Q: Does Eye Control work with all applications?
A: While Eye Control can be used to navigate and interact with most applications, some applications may be better optimized for it than others. Basic functions like mouse movement and clicking will generally work, but more complex interactions might require some experimentation. Keep an eye out for applications that specifically advertise Eye Control support!
So, there you have it, a comprehensive guide to using Windows 11 Eye Control! We've covered everything from choosing the right hardware to mastering the basics of eye-controlled navigation. We’ve explored the real-world applications and benefits, and even peeked into the future of this exciting technology.
Now it's your turn. Take what you've learned here and start exploring the world of Windows 11 Eye Control. Experiment with different settings, try out different applications, and see how it can enhance your computing experience. And if you have any questions or encounter any challenges, don't hesitate to reach out for help. There's a vibrant community of eye control users and experts who are always willing to share their knowledge and experience.
Ready to take the plunge? We challenge you to set up Eye Control on your Windows 11 machine this week and see how it can change the way you interact with your computer. Share your experiences with us in the comments below – we'd love to hear your stories and learn from your insights. After all, the future of computing is here, and it's looking right at you! So, go ahead, unlock the power of your gaze and discover a whole new world of possibilities.
Post a Comment for "How to Use the Windows 11 Eye Control Features"
Post a Comment